How to Prepare Your Photos for High-Quality Canvas Printing

Artwork makes your home look and feel fantastic, and even better when it's a photo with sentimental value. It can be an action shot, an epic landscape or one of those personal moments you managed to capture. Either way, displaying it in your home makes the moment even more special. Having that photo printed on canvas, rather than framed, can make it feel vibrant and professional and feel like art.
However, not every photo is suitable to print on canvas. The difference between a canvas photo that looks sharp and vibrant versus one that is blurry and second rate all comes down to the source image, how well it is prepared before it goes to print.
This is why the team here at Master Framing has put together this guide on how to prepare photos for high-quality canvas printing to hang on the walls of your home. We’ve helped countless Sydney customers bring their photos to life on canvas, and we’re here to help you too.
Let’s get started.
Why Photo Quality Matters for Canvas Printing
Photo quality matters because trying to stretch a small, low-resolution photo across a large surface is going to magnify any flaws in the image. High-resolution photos guarantee sharpness, colour vividness and image accuracy. High-resolution images manage to turn a treasured digital memory into a treasured piece of art.
Low quality images, when enlarged for the canvas, will cause pixellation. A pixel is essentially a square of colour on your image. The higher the resolution the smaller these squares are, and the more detailed your photo is. The lower the resolution, the more noticeable these squares, or pixels, are to the viewer.
Higher resolution images also carry more accurate colour data. Often when compressing images for display online, colour is compressed and shifted, resulting in dull representation. If you find an image online you like, and want to print it on canvas, beware of this colour compression. Once you have compressed an image to make it smaller, you cannot enlarge it again to increase the resolution. Always zoom in to an image to test the resolution.
Understanding Resolution
Resolution is the amount of detail in a digital image. It is measured in Pixels Per Inch (PPI) for the digital screen, or Dots Per Inch when printed on canvas.
An industry rule of thumb is for the best possible print results, a resolution of 300 PPI is the minimum for smaller prints viewed up close. Obviously the more PPI the better the resolution.
If you have an image that is under 150 PPI, when it is stretched for a larger surface, the printer has to guess what colours go in the spaces between the pixels. This results in the blurry effect known as pixelation.
The higher the resolution the bigger the art print you can produce and the more detail is retained in the image as it is stretched on the canvas. If you have a resolution of 4000 DPI, for example, you can easily produce a wall-sized canvas for a foyer and still have sharp and crisp details.
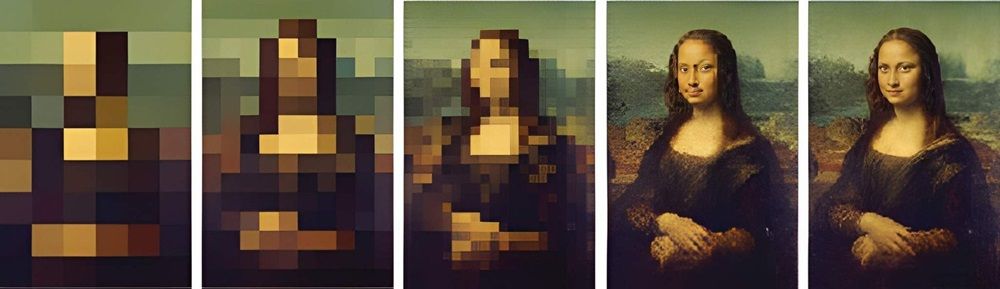
Photo Preparation
Before placing an order with Master Framing, its a good idea to check the digital properties of the image you’re wishing to put onto canvas.
On your computer, or your phone, open the image and look for the image file information. You want to find the pixel count. It should give you length then height of pixels, eg 6000 x 4000 pixels.
From here you can calculate an approximate canvas print size. Take the pixel dimensions and divide them by 300. For the image above with 6000 x 4000 pixels, when divided by 300, you would come up with a 20 by 13 inch canvas, which is 50 by 33 cm. On our website you can choose either inches or centimetres.
Avoid downloading images from online sources. They are compressed to save file space and ensure quicker loading times, and hence they would have low pixel measurements and would not look good on canvas.
The Best File Types for a Canvas
While there are many different file types for images, we recommend three main types of file format when considering displaying them on a canvas, hung on your wall.
- JPEG/JPG: This stands for Joint Photographic Experts Group, named after the committee who created this standard image file format. It is a universal standard file type for digital cameras, smart phones and print shops. Always export your JPEG’s at the maximum quality possible. Don’t re-save or re-compress as this will lose data and increase pixelation.
- TIFF: Tagged Image File Format, it is a professional standard graphic file. TIFF files use lossless compression, which means no image data or fine details are lost or discarded. They are perfect for gallery-quality printing and can produce stunning images. The file sizes involved are much larger than LPEG and will take longer to upload, so please be aware of that.
- PDF: This is a Portable Document Format and is a universal file type used for maintaining layout, text and other elements of a file without changing. If your canvas art includes overlays, text and photos, this is the file format you want to use.
How to Check Image Resolution Before You Print
- Locate the file dimensions. Always use the original image. It needs to be uncompressed and in its full size. Viewing on your computer is easier.
- On Windows. Right-click on the image and select ‘Properties’. Go to the Details tab and look for ‘dimensions.
- On Mac. Right click or control click on the image. Choose ‘Get Info’ and locate ‘Dimensions’ under the MORE INFO section.
- Verify how big you can print. Check your pixel count against an online sizing source such as the Pictorem Image Size Analyzer.
Colour Profiles and Why They Matter
A colour profile is a translator that tells your editing software, your display and the printer how to interpret and reproduce the colours from your image. Examples include sRGB (standard Red Green Blue) and ICC (International Color Consortium).
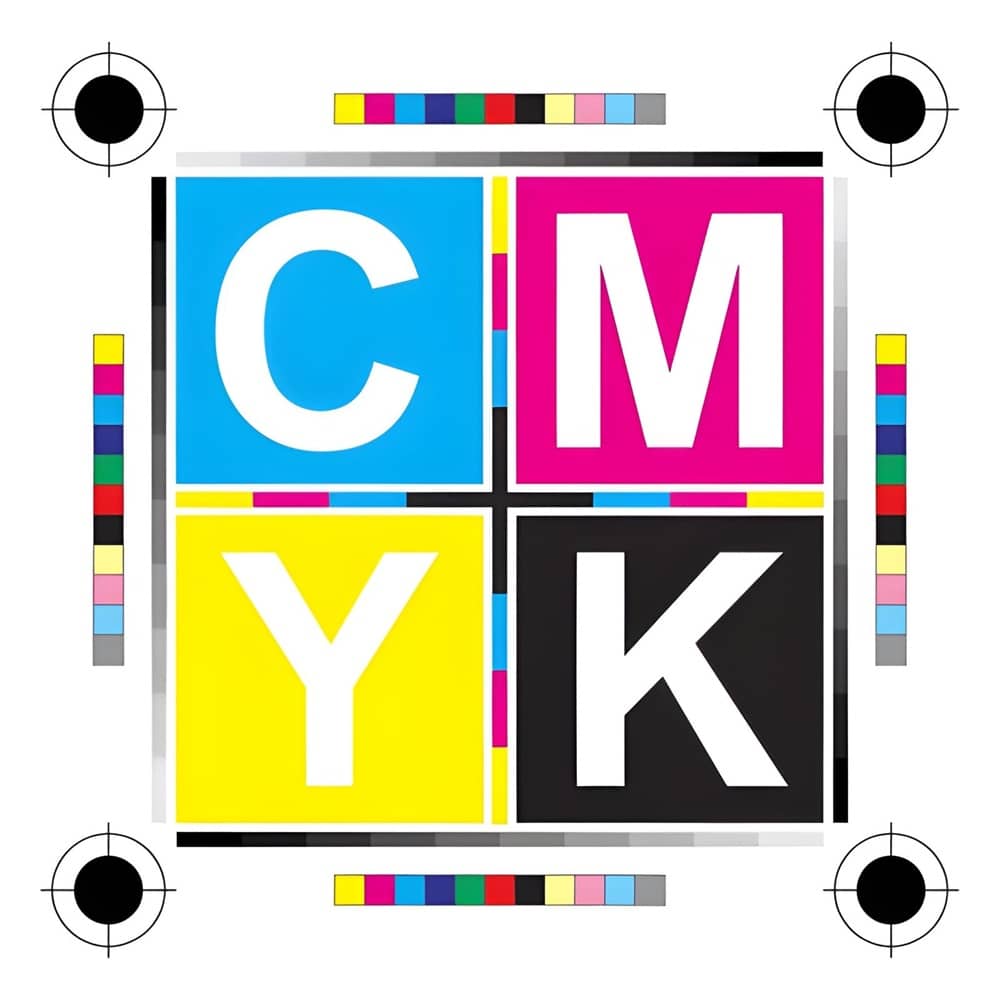
Digital cameras and computer monitors display colours using emitted light- RGB. Printers create colours using physical inks, the CMYK model (Cyan, Magenta, Yellow, Black). The RGB range of colours is much larger than the CMYK range, so simply sending a digital photo to get printed could cause some unpredictable shifts in tone.
- Preventing "Dull" or "Flat" Prints: Without an embedded colour profile, a printer will just guess how to translate bright RGB screen colours into printable ink, often resulting in washed-out or muddy prints.
- Predictability: Embedding the correct profile ensures that the exact shade of red or blue you see on your calibrated monitor is the same shade that gets physically laid onto the canvas
Cropping and Composing Your Image for the Right Canvas Size
The aspect ratio of an image is the proportional relationship between the width and the height, such as 16:9, for example.
If your camera’s native ratio doesn't perfectly match the canvas dimensions, the printing software will either force a crop or add black or white borders to force a fit.
Before you upload your images check the canvas sizes offered and ensure your original file fits the dimensions. This will prevent any cutting off of the image, or inserting borders that might take away from the beauty of your photo.
Cropping your image can work for composition, however it can impact printing resolution. When you crop a digital image you are deleting pixels and hence lowering the total resolution.
Tight crops lead to lower quality images. There are fewer pixels available to stretch across the canvas. For larger canvases you need a large, high-megapixel photo that needs minimal cropping.
On the plus side, cropping can be used to shift the focal point of an image. You can centre the eye on a person if they were a little off centre, for example.
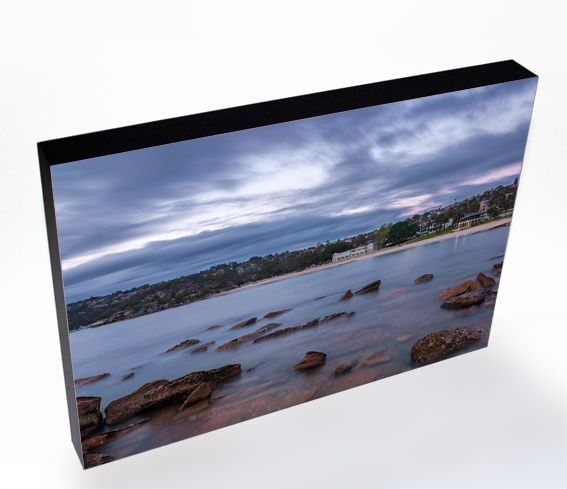
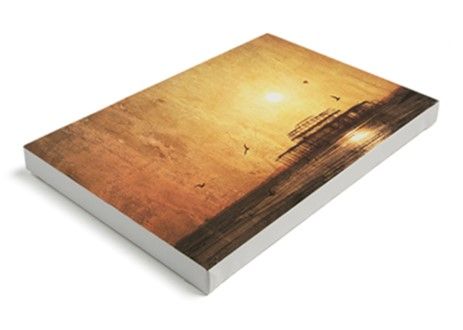
When preparing your image for a canvas, remember the canvas ‘wrap’. The frame has depth, the image will wrap around the side of the canvas. This means the outer edge of your photo will literally wrap around the side and won’t be seen.
You can either crop or compose your shot to allow for this canvas wrap, or the online printing services may help by adding a black border which is enough to cover the wrap. Or there could be a mirror wrap option, that mirrors the edge of your image enough to form a wrappable portion.
Ready to Print? Here's How to Get Started with Master Framing
Once your image is properly prepared and you’re confident it will look fantastic on a canvas print, you’re ready to bring it to life with Master Framing. We make the process easy by uploading your image, selecting from frame size and other options, and then hitting order. Our team will piece your work together and produce a fine canvas print ready to hang on your walls.
Beyond printing and framing we also offer canvas stretching, acrylic photo mounting, display boxes and mounting, all using acid-free materials to ensure your art is preserved for longer. We can deliver custom canvas prints all across Sydney and have postage across the country if you want to send a gift.
Your photos deserve the best presentation and that's what Master Framing delivers. View our online gallery and contact our team today, and we’ll help prepare your photos for the best canvas print you've ever seen.